The hub of the home has continuously been our pain point. For the past couple of years I’ve redone every other room, but I’ll be honest it’s been cosmetic for the most part (minus the living room, but I’ll save that for another day). When it came to the kitchen it would be a huge undertaking especially to do what we want to do, blow out that wall behind the fridge and conjoin it with the dining room, and we didn’t have a budget for that – hell we didn’t have a budget for any of it, I just figure it out.
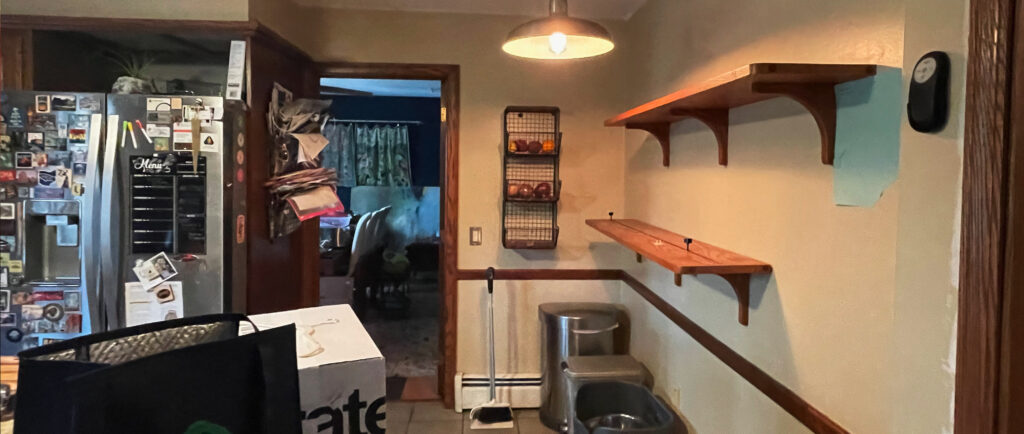
So, if we weren’t going whole hog on remodel, what can we do to make me not hate the kitchen? Paint, definitely, especially as it had one of the 10 shades of beige that was throughout the house when we bought it. And I’d hate to pay for new countertops if we plan to gut it, and then the cabinets, ugh. Ok, I’m getting overwhelmed just typing it out. Where were we…I loved these shelves from the first time we toured the house. Can you see the screws sticking out? They held wooden bookends that you could move. When we first moved in, our cookbooks looked amazing there. So the biggest headache as the years went on, was the reality of what was happening on the shelves and below them…
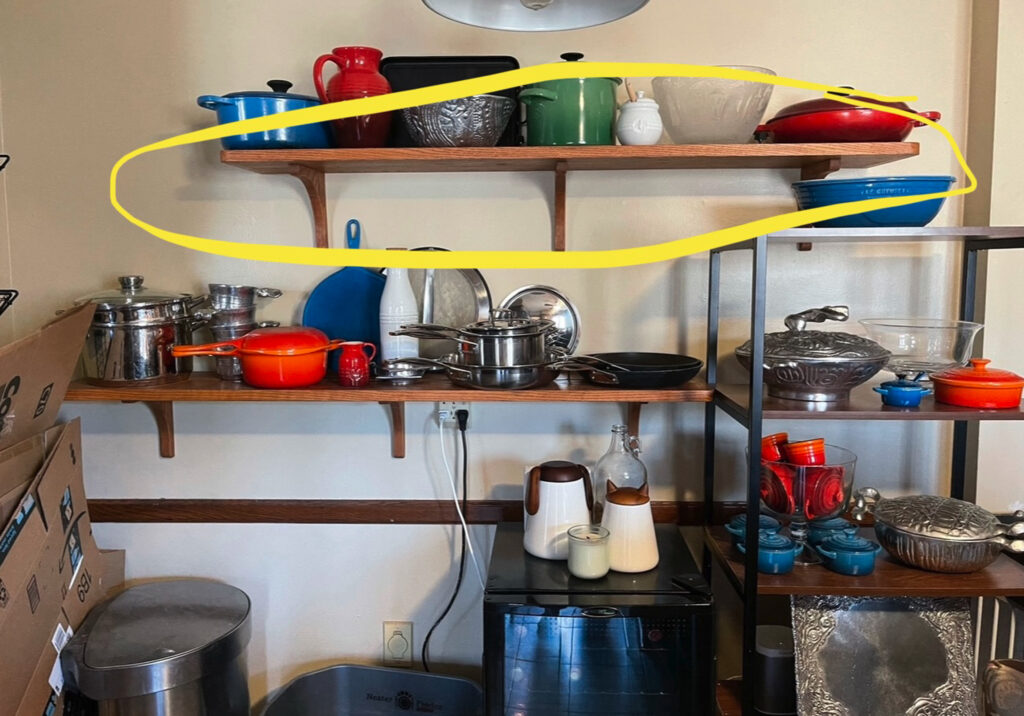
Overall Problem: too much cookware, and because of the location of the shelves, it was pretty much impossible to get find additional shelving. Blair’s Problem: the stacking of things, he couldn’t just grab a pan and cook. He wanted everything flat on a shelf. And obviously there was no way for that to work with the space we have. My Problem: The chaos. This photo was when things looking tidied. Day to day that vertical shelving had so much random stuff crammed on it. AND more importantly was Blair’s frustration. He does pretty much all of the cooking, so if he isn’t happy in there, then neither of us are. Oh! not pictured is the opposite side of the kitchen where Blair turned an entire section of the countertops into a drink station for himself (that was also constantly chaotic).
I contacted a custom millworker, and we came up with a design so that it would have tons of short shelves and cubbies, plus a dog area, tall cabinet for brooms, etc. The quote came back at 5K plus another almost $1,000 to remove the baseboard heating in that section. While that is a chunk of change, it seemed very fair based on the work, BUT if we do truly want to rip out that wall sooner than later, it would make zero sense to invest that much. Soooooo…thinking cap time…
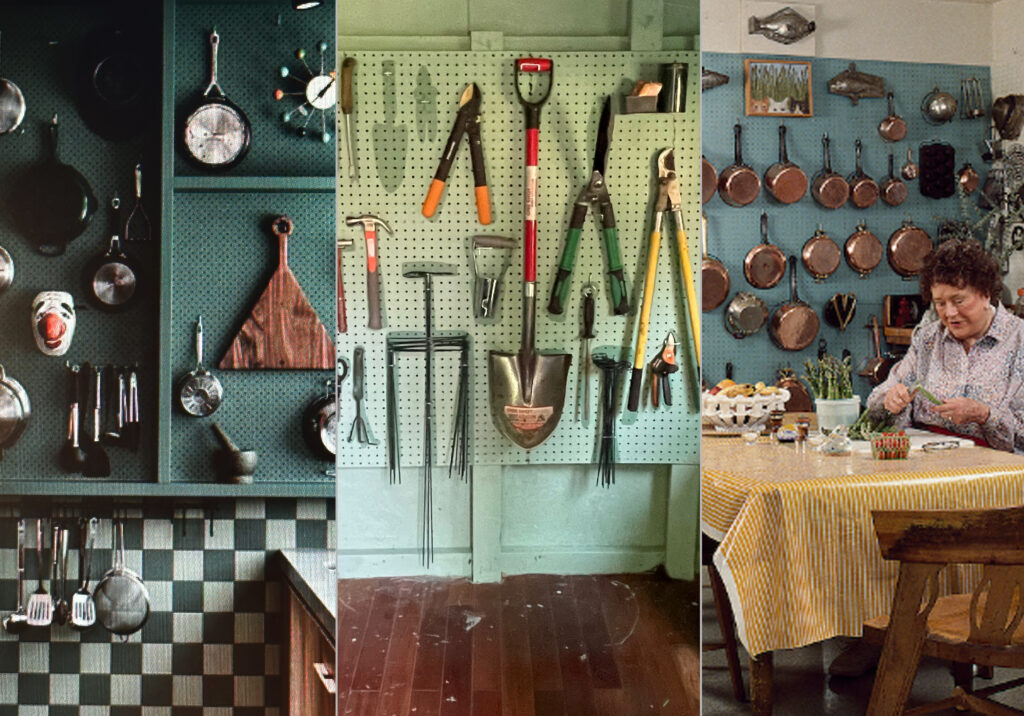
I considered so many options, including pot racks. We previously had one above the island, long ago removed, so Blair instantly shot that down, but it did get me to think if they would hang and have specific spots, then it wouldn’t look chaotic. LIGHTBULB! Julia Child’s kitchen! If you’ve followed me for a while, you might remember her kitchen was the inspiration when I redid our garden shed over the pandemic (see middle pic above). So yeah, that should work, and because I had already done the shed it solved another problem, getting Blair to visualize it. But I also wanted to make it feel more ‘put together’ or nicer I suppose. Gratefully I’m a pro at googling (that’s for you, Em 😉 ), and found the above left image, which broke apart the expanse of pegboard.
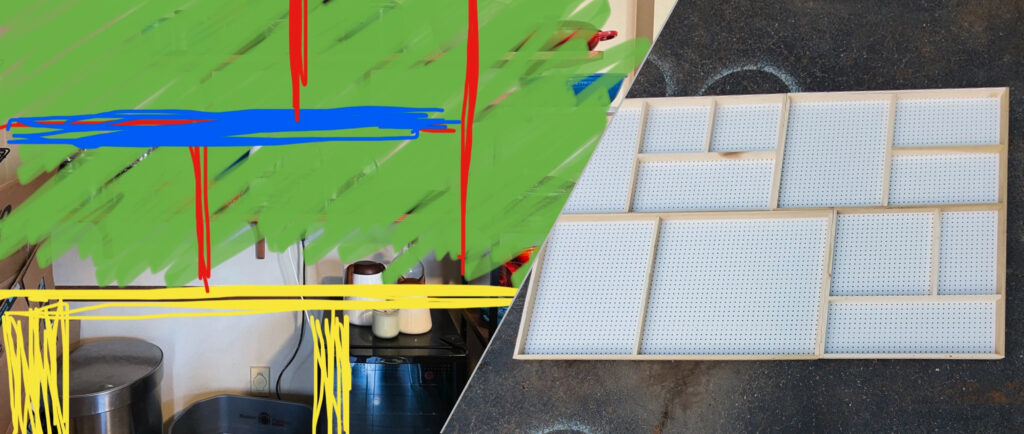
Gratefully my wonderful contractor dude, goes along with my crazy ideas, even when i send him crazy drawings like above left. The idea being the yellow would be a butcher block countertop and throw on some legs so that the trash can, wine fridge, etc. simply fit beneath it. Then the red would be raised portions and at first I was going to try to incorporate one of the cookbook shelves, the blue line. We scrapped that cookbook shelf idea pretty quickly. Contractor Chris sent me a pic of the shapes he built in his driveway. I was nervous at first because it had more lines than I planned on so i wasn’t sure how things would fit – and some seemed small, but I trusted him. He mounted it to the wall with spacers behind to allow room for the pegs to fasten.
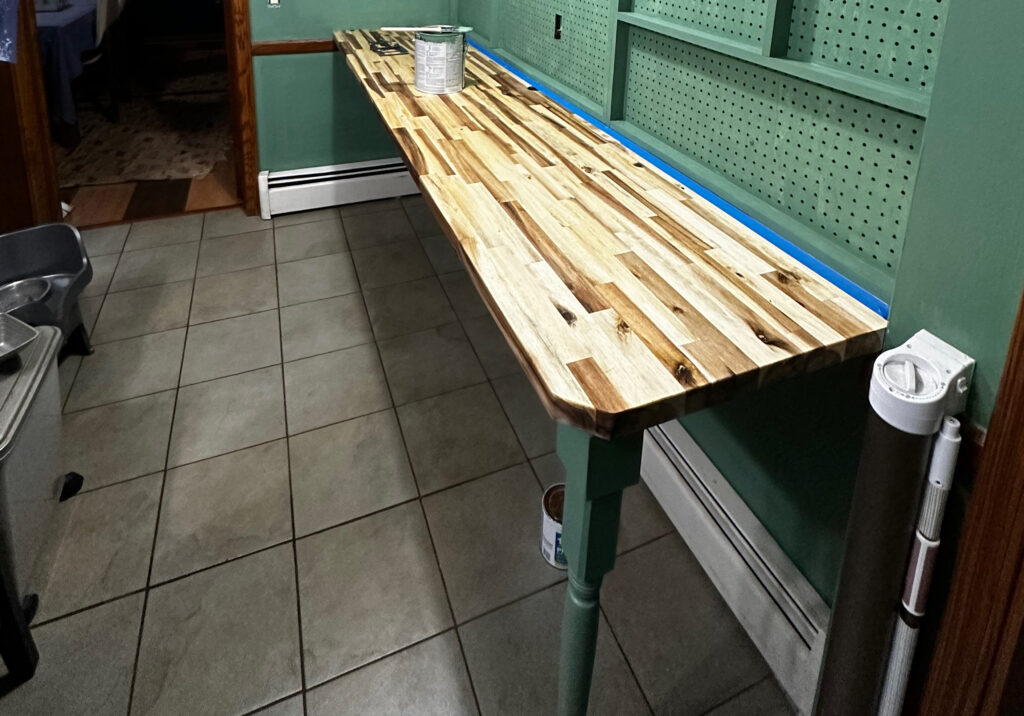
I think it’s going to work! As the painters were doing their thing I realized it was screaming out for organization below. Amazon to the rescue!
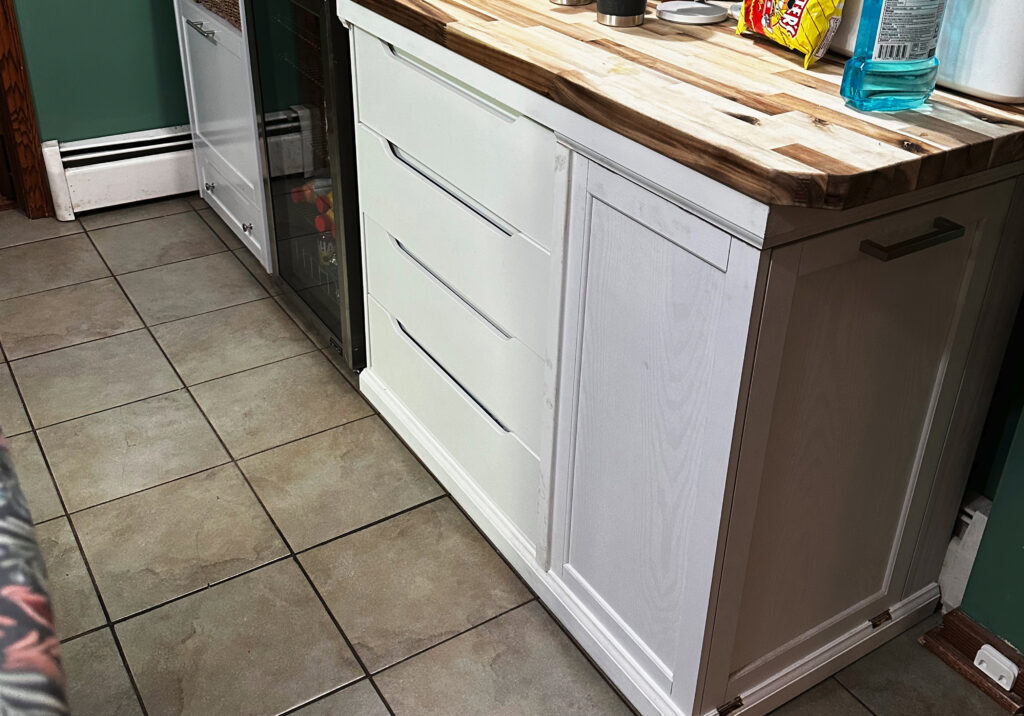
If I could find individual components, I could work with Chris to add continuous trim to make them look like built-ins and then I could paint them. Now, I measured like three times, but I forgot to account for that stupid baseboard heater (side note, we don’t use that furnace since we had Novak Heating & Cooling install ductwork 2 years ago), so we ended up having to turn the trash portion sideways. Despite my mom thinking they looked fine as they were, the various whites would have driven me insane, plus it’s not real wood so they all had different crappy finishes.
Ugh, since we turned the trash bin on the end sideways, there was now an extra gap, by the fridge. I thought we’d add more trim, but brilliant Chris suggested I look for a spice rack or something…
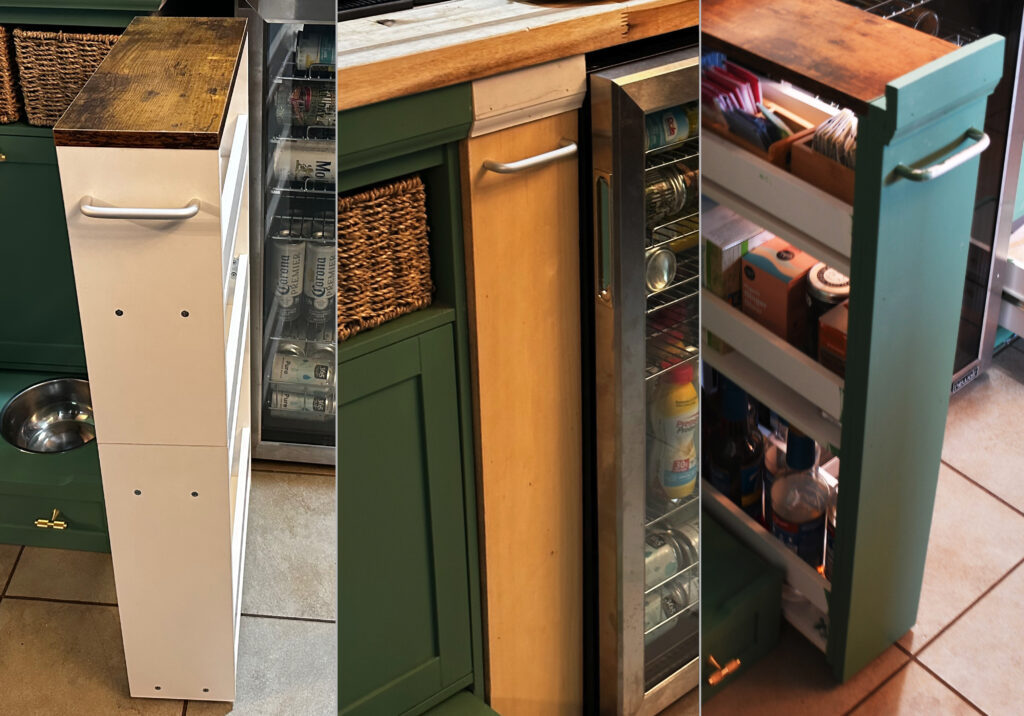
Bingo! I found a spice rack on wheels that should fit perfectly, though a little short. And again I had to contend with the slick MDF boards – not just that but the terrible seam and the screw holes. Chris to the rescue. We found a board in the basement that he added to the front, plus he matched trim to the rest of the row (middle pic). Of course I still haven’t changed out the handle here to match all of the knurled brass handles now throughout the kitchen, but one day I’ll find a screwdriver that fits into the now super deep holes through all of the surfaces. FYI, I don’t think Blair has pulled this rack out once, and it houses most of his teas.
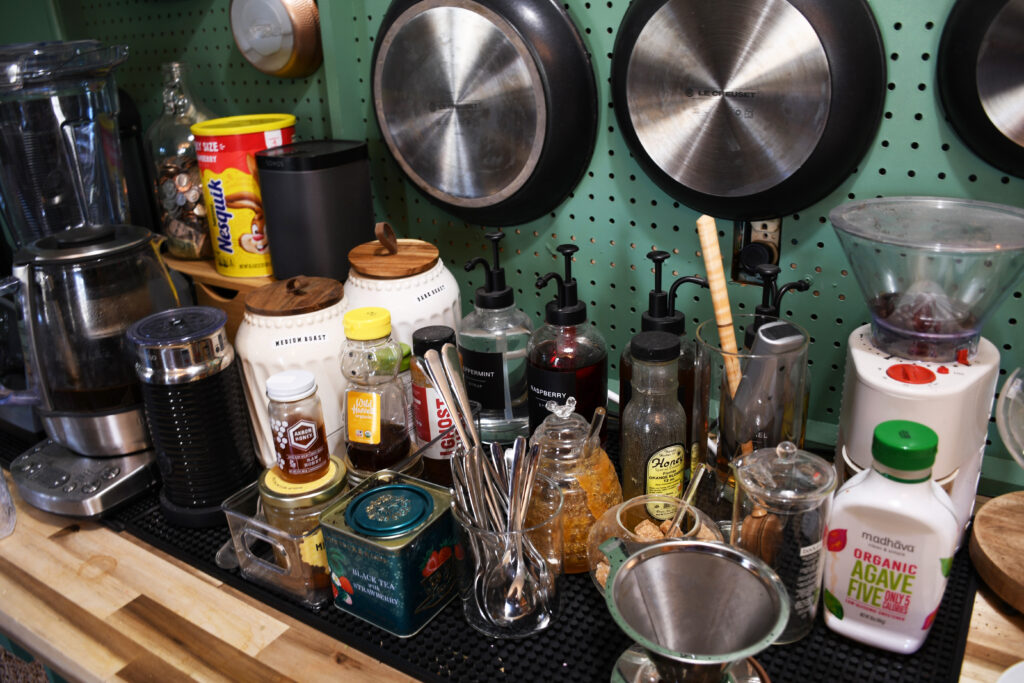
While he doesn’t pull out the spice rack turned tea rack, he does adore his coffee bar situation. Most used item: his Nesquick Strawberry powder.

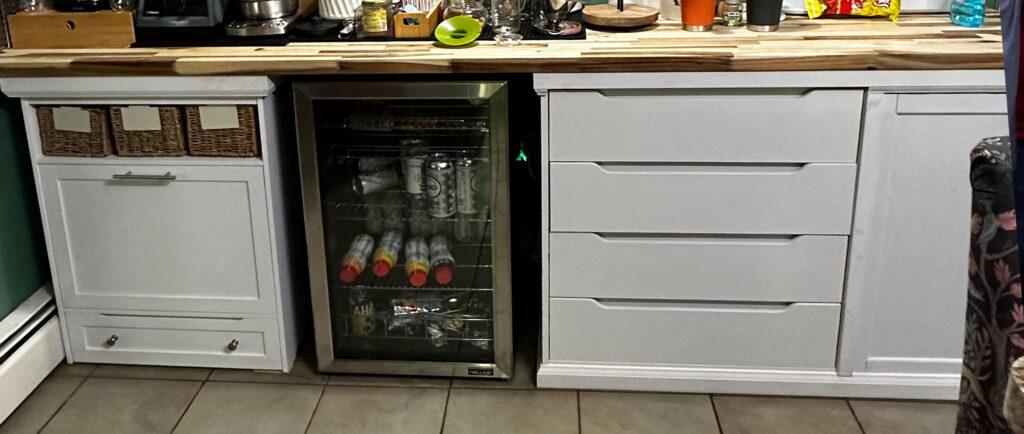
The food situation for the pups has been another major improvement. The dog feeder station is just so easy to use! We do have to feed them in separate rooms, or Piper would eat it all, so we have their water in a crock in the dining room with Quinn’s food bowl. I did notice the board shown here with the bowls doesn’t seem to love water. Each of these components were around a hundred dollars each. From Chris, to the painters, to the furniture, I probably spent a third of the custom millwork price tag. If we were planning on it for longer term, the quality of the custom would have been well worth it! While I primed everything before painting, it’s still paint on crappy materials, so I will be touching these up until we rip them out.
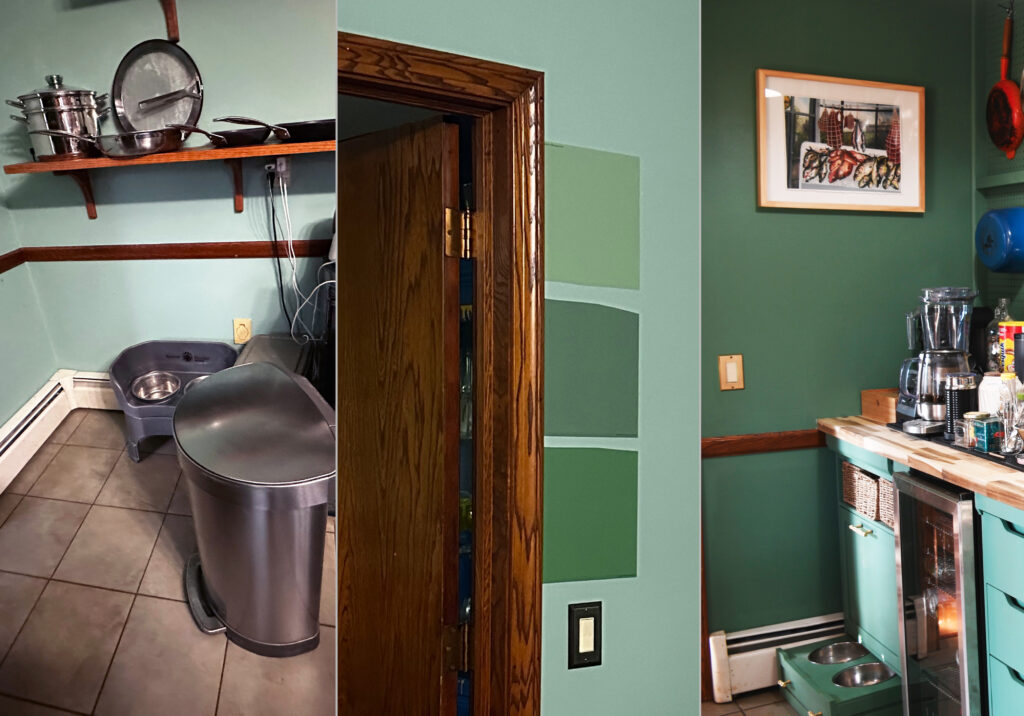
If you’re not new here, you also know I had the kitchen repainted 3 times. I’ve never been indecisive on color, and I honestly wasn’t, green is just super hard, and the lighting in here dramatically changes as the windows face east. Above left, gag – it felt like seafoam/Little Mermaidy. Side note, that first painter liked it so much he painted his kitchen that color after he did mine, so it was fun to tell him that I hated it and paid him to redo it (middle). The dining room is navy and the hall is super pale sky blue, and this was too minty – closer, but still not right. On the right, I was finally happy, day and night!
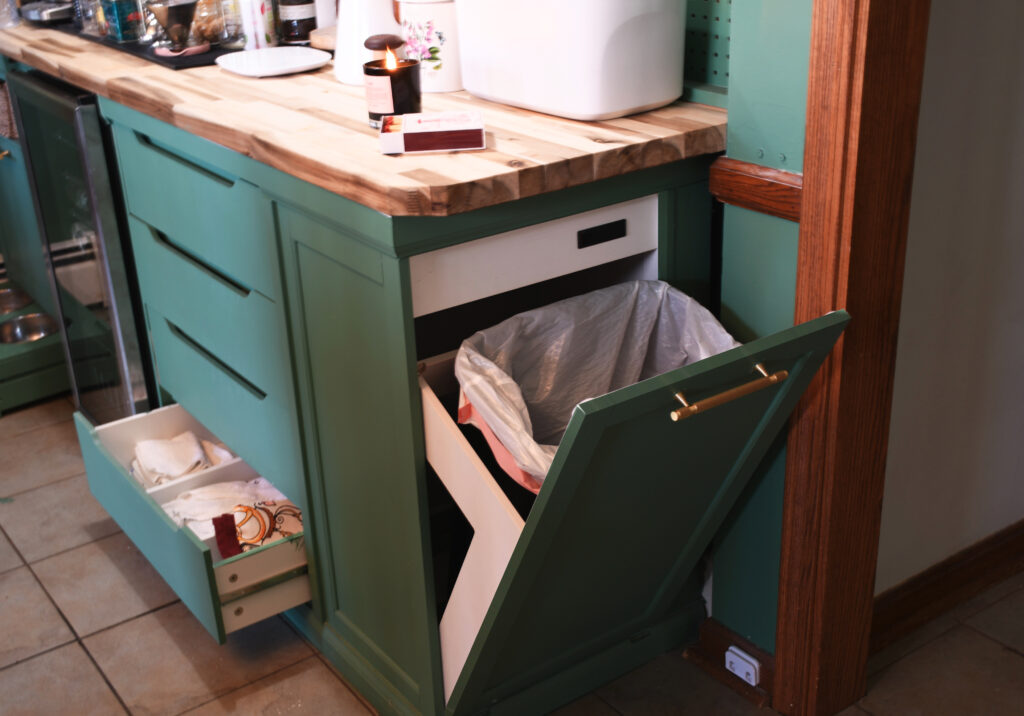
I put a trash bag in the bin for this pic this morning. Maybe now we’ll use it and i can finally get rid of the metal step trash can semi-blocking the dining room door. The only downside to having to move the component to the side, as shown here, is we now have a fold up dog gate that leans against it when it’s not feeding time for the pups.
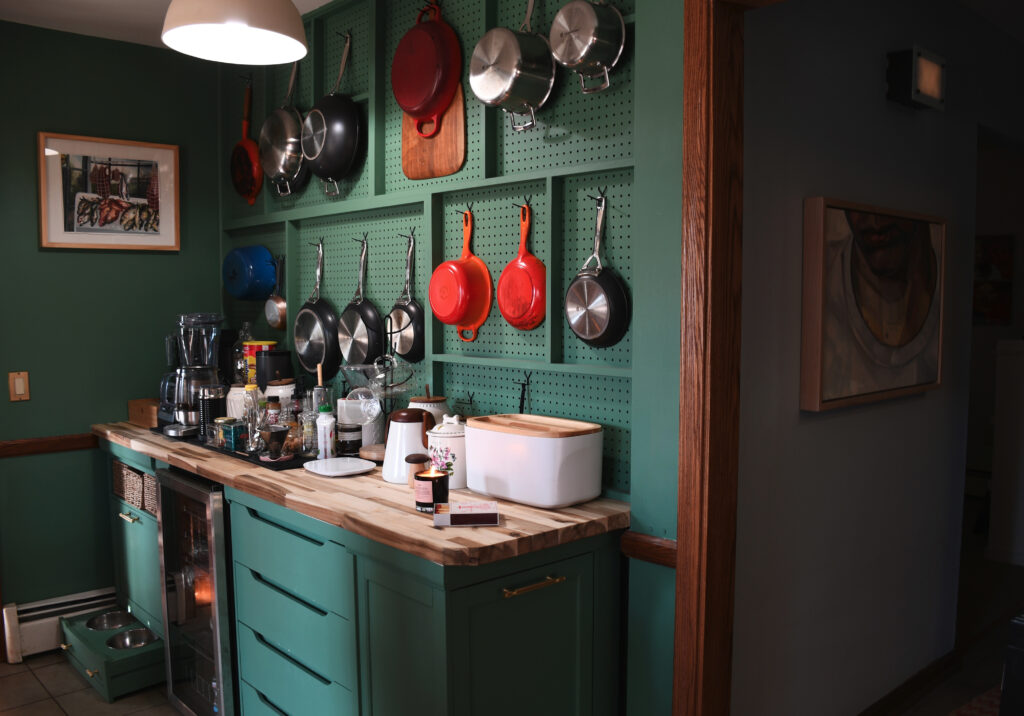
Ah! we made it! You reading, and us using! Things just fit, and while I didn’t outline the pot shapes on the pegboard, we know where things go. We’ve moved the coffee bar for parties to have buffet area, etc. And where that pretty BoySmells candle is, that’s usually where a pile of junk is, but at least it overall feels better there, now.
Catch ya next time (pun not intended). Painting by Katie Butler.
TO SHOP FOR A LOT OF THE PRODUCTS SHOWN, check out my Amazon Storefront >
As an Amazon Associate I earn from qualifying purchases.